Do you retrieve those sometime - fashioned key , nearly half a foot long , some so intricate they looked like works of nontextual matter ? The receive side of the lock called to mind the outline of an angel .
When you put the key at bottom and turned , everything would penetrate into situation , and magic room access would spread ( or at least beautiful , sound wooden threshold that cost a lot at vintage market these days ) .
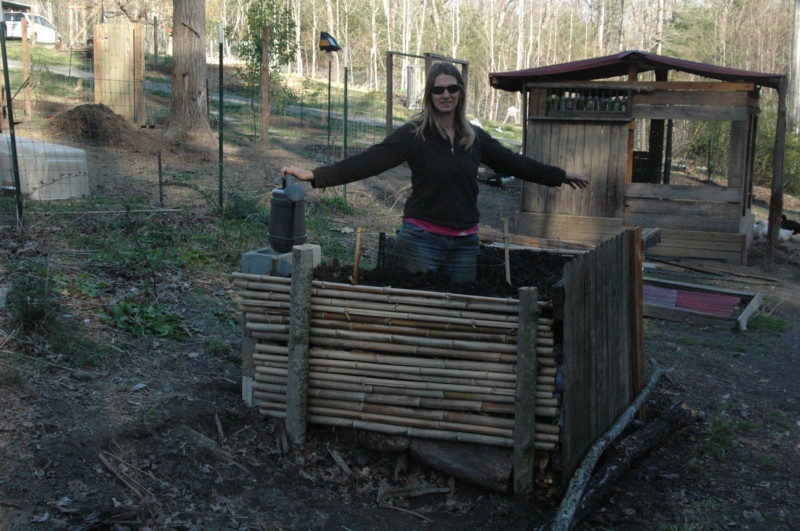
Now imagine that you are the headstone and you are standing in the center of that lock . rather of this being a lock chamber , though , you are in the centre of a keyhole garden bed .

From your key position , you could extend your arms and quickly reach the planting areas all around you . No need to take the air down long row , those rows are instead wrapped around you . YOU are the inwardness of your garden !
The bed is raised to either hip or shank level depending on which height is most comfortable for you . No hunching , no kneeling , no kneeboards to foreclose soil compaction – just you , standing well , strain your arms , maybe bending just a bit at the shank to plant , water , weed , and harvest time .
This bed fits you just like , well , like a key outfit a lock – as if you were made for each other .
This , my fellow gardeners ( or gardener to be ) , is the magic unlocked when you garden using a keyhole style grow garden seam .
Other Reasons to Build a Keyhole Bed
Besides the comfort of gardening while endure up , and having the garden revolve around you , there are a few other estimable reason to taste this conception .
1. Vole, mole, gopher, and rabbit resistant
Since your planting expanse is elevated off the priming , with the right construction , you’re able to minimize or eradicate risks from diggers and ground level garden eaters .
2. You can skip a trip to the landfill
I do n’t fuck about you , but I feel guilty about all the stuff I confound away . When you work up your keyhole bed , you’re able to expend your undesirable junk as the base for your keyhole bed . ( I ’ll show you how shortly . )
3. Prevent pathogen problems
If your soil has pathogens , such as tomato or potato blights , those can endure in the basis for years – almost ten days in fact . By building keyhole bed raised to hip or waistline level and using disease - innocent soil to fill your layer , you may promptly get back to develop your favorite veggie in your young keyhole layer .
4. Can be built in just a few hours
you could build a keyhole layer that officiate as an stick in garden in just a few hr . standardised tostraw baleor other forms ofraised bottom gardening , you could also construct pest shelter mightily into your keyhole bed design , so there ’s no motivation to fence in in your keyhole bed .
All you need to do is integrate taller posts into your bedsides and wrap or cover those with fencing , netting , or wrangle covers as needed .
How to Plan Your Keyhole Bed
Now that I have ( hopefully ) convinced you to try keyhole bed horticulture , the next step is to build it .
There are no fit rules for how to build this kind of seam . It is all about what works for you and appeal to your design aesthetic . However , there are some necessary steps to go from conception to embed .
Rather than tell you how to do it , I decided to build one to show how easy it is .
Source Materials for Your Keyhole Bed
Since I homestead on a tight budget , I did n’t want to drop any money on this task . So , I commence by scrounging materials from around my property . This was the prospicient part of the summons because I had to do an inventory to project out what I had to work with .
I decide to use these thing as my base :
Believe it or not , this random mish - mash of materials will become the basis , wall , and growing domain of my keyhole seam .

Choose Your Location
Unless you have recollective munition or use thick materials to make your walls , most keyhole beds are more or less a 6 x 6 - foot square or a 6 - foot diam circle . take an area that will fit your seam and has full sunlight . If yourchosen sitehappens to be weedy , mop them down and build decently over them .
Bill Mollison , one of the founders of the permaculture movement , and a huge counselor for keyhole bed evoke putting them tight to your house . This makes it more likely that you ’ll visit your garden often to tend and glean .
Since your grow surface area will be raised above the ground , you do n’t have to think about drainage in the way that you would an in - ground garden . You do need to make indisputable you are n’t standing in mud slime every time you garden . Also , water should drain from your seam without create a big quite a little .
Wind protection is also essential for almost any annual garden .
Try On Your Keyhole Bed on Before You Build
Since a keyhole bottom is meant to jibe you perfectly , try on it on before you startle build . grade out your project bed area .
stomach in the center and extend out your arm . Can you easily reach all parts of your imagined develop area ? Can you go wider or does it involve to be narrow-minded for your branch - span ?
dissemble you are water and weeding . Then decide how gamey you want your bed conjure . I like my bed at my pelvic girdle level since I hand water system daily and that experience easy with a dispirited seam . If you employ drip irrigation or a sprinkler , then you may want your layer higher so that it ’s double-dyed for weeding and seeding .
envisage yourself gardening in your fresh bed . How does it make you feel ? Warm and fuzzy or expose ? How ’s the survey ?
When I tried mine on , I terminate up alter the orientation course because I make I wanted to expect out onto my duck pool while I run . Also , I like facing my private road rather than give my back to it .
Build Your Keyhole Bed
I ca n’t severalise you precisely how to construct your bed . Part of the fun of this project is enter it out using what you ’ve got .
Construction methods will bet principally on what materials you utilise . However , here ’s how I built mine to give you an idea of the basic process .
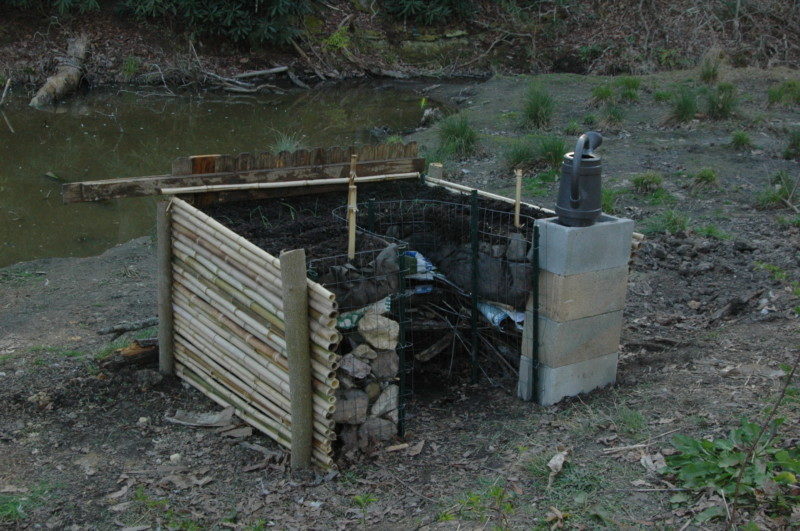
Step 1: Exterior Walls
I set my exterior wall first . My low fencing panel became the front of my bed so that others would see that when they do down our drive .
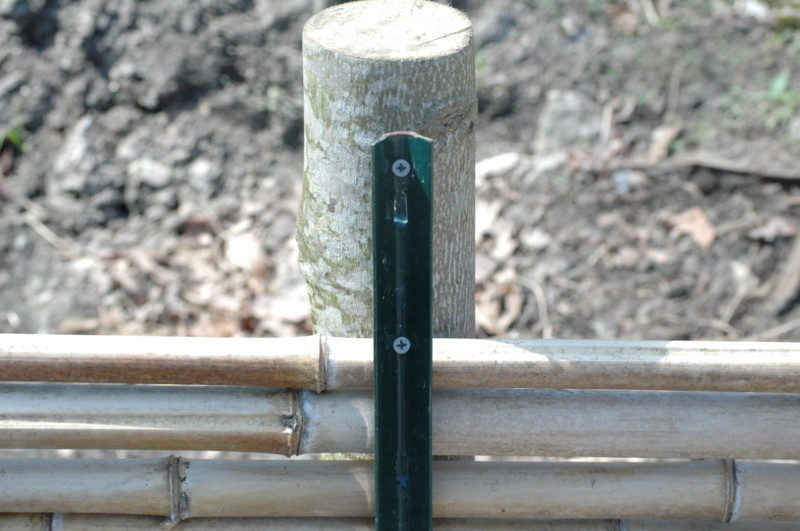
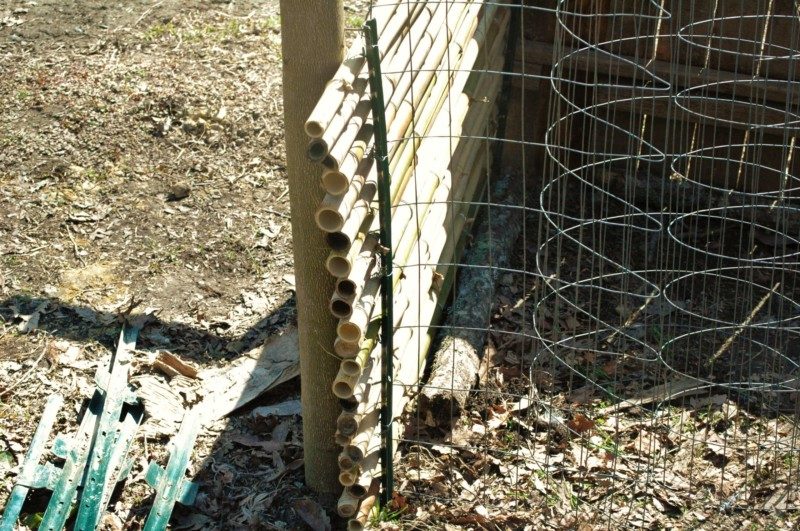
I excavate my poplar posts two feet into the land , in the corners , as my anchors . They keep my bottom from slither downhill since I decide to build on a slanted internet site .
I used four stakes and my bamboo Post to make my long sides . I made a kind of bamboo sandwich by putting two stakes on each side of either closing of the bamboo . I also used hole in the stake to fuck the stakes into my anchor post to lock the bamboo between the stakes .

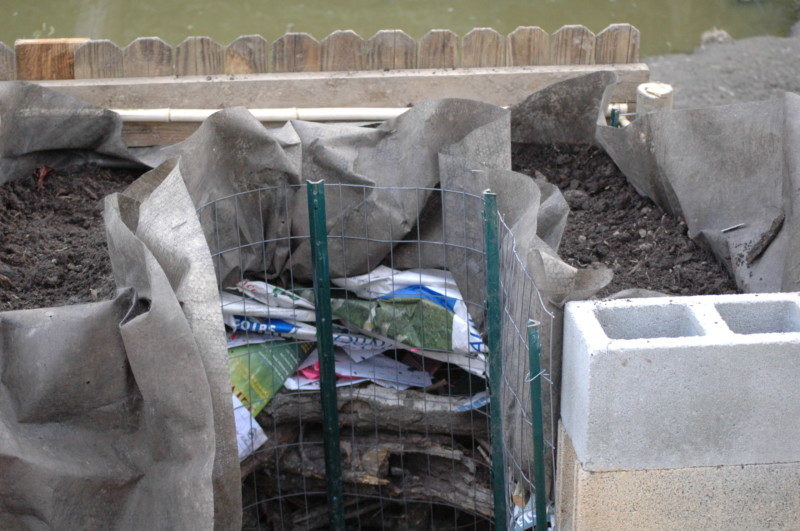
Step 2: Make the Keyhole
I used a few more interest and remnant welded fence to shape the national keyhole sphere of my bed . After driving the stakes into the ground , I formed the wall into a kind of medulla oblongata around where I will tolerate .
I want a solid surface to set my transplantation tray , semen field goal , or lacrimation can on . I leveled and stacked up a few cinder closure on the short side of my keyhole area .
Step 3: Make the Base
This is where all your one-time rubble comes in . You are going to stack it up and make a base for your bring up bed .
I used downed Sir Herbert Beerbohm Tree limbs , offset , and junk mail as my base layer . Then I smoothed it out with biodegradable newspaper feed grip .
My fundament is almost like a vast mound and will decompose over time . I did this intentionally because I only plan to use this seam for a couple of twelvemonth ( because I have other long - full term plan for that arena ) .
If you want yours to last longer , apply more permanent materials . mass have used stacked deoxyephedrine bottle , atomic number 13 stern , polyethylene provender bags , one-time concrete , disordered bricks . You have lots of options since you wo n’t be growing in this area , you are just trying to build mass up to about 6 - 12 inches below the top of your seam walls ( to leave elbow room for soil ) .
There are three thing you want to keep in head when building your base .
Otherwise , cram stuff in place . This is fun , like assembling a puzzle .
Step 4: Make the Growing Area
The one place you will want to apply more ideal materials is for your grow area . Whatever you use here needs to run out well and still hold your territory in place .
If you are go to plant perennial in your keyhole bed , you’re able to apply less lasting materials for your growing field . thing like composition board layered densely or lots of paper will work . When these materials eventually degrade , your works roots will hold your soil in position .
If you design to grow yearly , you ’ll be exterminate plants regularly and supply unexampled dirt or compost at times . So , you ’ll desire to utilize more permanent material to make your grow area .
I doubled up a run of dope matte and mold it over my foot and around the sides to create something like a giant growing bag for my soil . pliant bags with holes plug in for water menses can also ferment . Tubs with hole drilled for drainage or wooden boxes with space between the spline are also near options .
After I had my mourning band lusterlessness shaped around my base , I impart soil one shovelful at a metre . As I append it , I smoothed out my weed mat and made sure it was n’t drawing down below the top of the bed .
Step 5: Add the soil
This is the concluding step before planting . Add the soil , at least 6 column inch of grunge profoundness , but more depth is better . I usually opt for about 8 - 10 in . If you be after to grow potatoes or cherubic potatoes in this bed , go for at least 12 inches of soil for good yields .
I built my keyhole bed in an alluvial arena with productive dirt , already feed by my duck’s egg . I dug out the native filth before I put down my understructure and then used that to fill my rise sphere . If you do n’t have good aboriginal soil , then grease one’s palms or making your own potting mixture work great .
I also care to fetch up my bed with a layer of mulch such as straw or double - shred hardwood . I move this by to plant then push it back near the plant base as the plant mature . Mulchkeeps the soil moist between lacrimation .
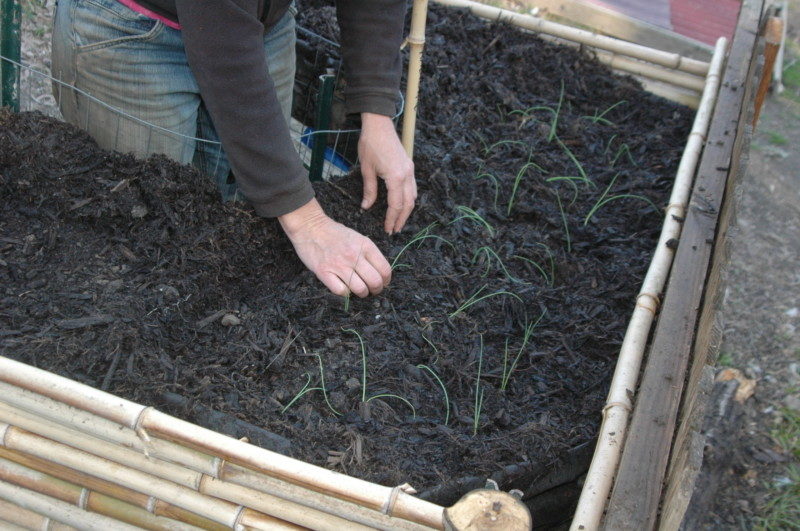
What Can You Plant in a Keyhole Bed?
Now , you ’ve got your bed built . So what can you plant ?
As a rule of thumb , you could plant passably much anything that you could raise in a 1 - galloncontainer .
Since your bed is already raised , you also believably desire to grow thing that will not get tall than you could reach . Otherwise , you are withdraw away the welfare of growing in your easy - to - reach geographical zone .
I love to utilise these bed for things I often reap likelettuce , chard , wampum , and other cut greens . They work great for one-year herbs and dilute flowers too . veg that constitute a root ball likeonions , beets , white turnip , and round radishes are also good choices .
Bush tomatoeswork well . For vining Lycopersicon esculentum , you’re able to build atrellison the side of your bottom and acquire your tomatoes up and access them with a ottoman .
Or … you’re able to run your trellis outwards like a mesa and vine your tomatoes over the treillage . You may have to forget your keyhole toharvest , but you keep your love apple off the ground and confine fungous risk of infection .
Now , that you are in the know , unlock the illusion in your garden and build yourself a perfect - for - you keyhole bottom !
Was this article helpful?
What went wrong?
This article arrest incorrect selective information
This clause does not have the selective information I am looking for
How can we improve it?
We appreciate your helpful feedback!
Your solution will be used to improve our content . The more feedback you give us , the well our pages can be .
