If you corrupt an item via links on this varlet , we may earn a delegation . Our editorial subject is not shape by commissions . translate the full disclosure .
Do you have one item you ’ve especially want around your homestead but have n’t gotten around to getting it ?
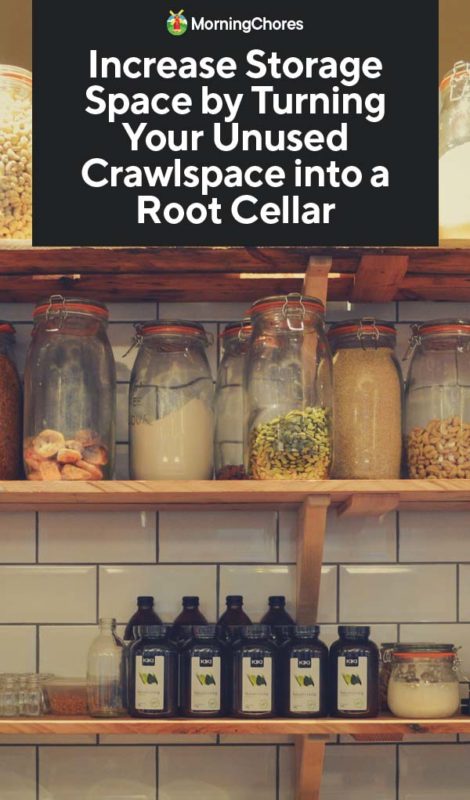
Well , this is how myroot cellarwas for me . When we lived on our small homestead , we had to use creative ways to put in ourcanned foodand otherfood items . We would apply buried trash cans ; we wouldstore food under our bed , or lay a few things under our sign .

Still , I did n’t get to have a walk - in beginning cellar . When we actuate to our larger homestead , I experience I want a pass - in etymon wine cellar .
Yet , it seemed like a big undertaking with many other task on the tabular array . My hubby came up with a toll - effective agency to turn our crawl space into the root cellar of my dreams .
Here ’s how we converted our crawl space into a root basement with hardly any out - of - pocket costs :
You’ll Need:
The Story Behind Turning our Crawlspace into a Root Cellar
For you to understand why we had to fulfill our root root cellar using the method we did , you must fuck our history .
I go in a little dwelling house with a ruined basement . One side of the cellar is sleeping accommodation , while the other side has this ill at ease hallway .
For whatever reasonableness , when the house was built , the premature owner did n’t make the cellar the entire size of the house .
Instead , we had this eldritch scrawny hallway , a cinderblock wall , and a threshold which go to a crawlspace that had vents and alight in it . It was a overnice space .
My husband hate to have unused space . In his mind , this was the consummate root wine cellar for us . Therefore , we went to study making this awkward , unused crawl space into space which can be used by us .
Creating the Root Cellar
1. Cut Through the Wall
The first thing we had to do to tackle this ascendant cellar was tocut through a cinder city block wall . The crawlspace had been filled with loose dirt to a sure stop .
We had to remove a few cinder mental block , dig out the grunge until we could get to the next course of cinder blocks , and repeat the process until we could get inside the crawl space .
It was quite the project to get inside the space we want to habituate as a ascendant cellar , but I can say , it was worth every drop of sweat .
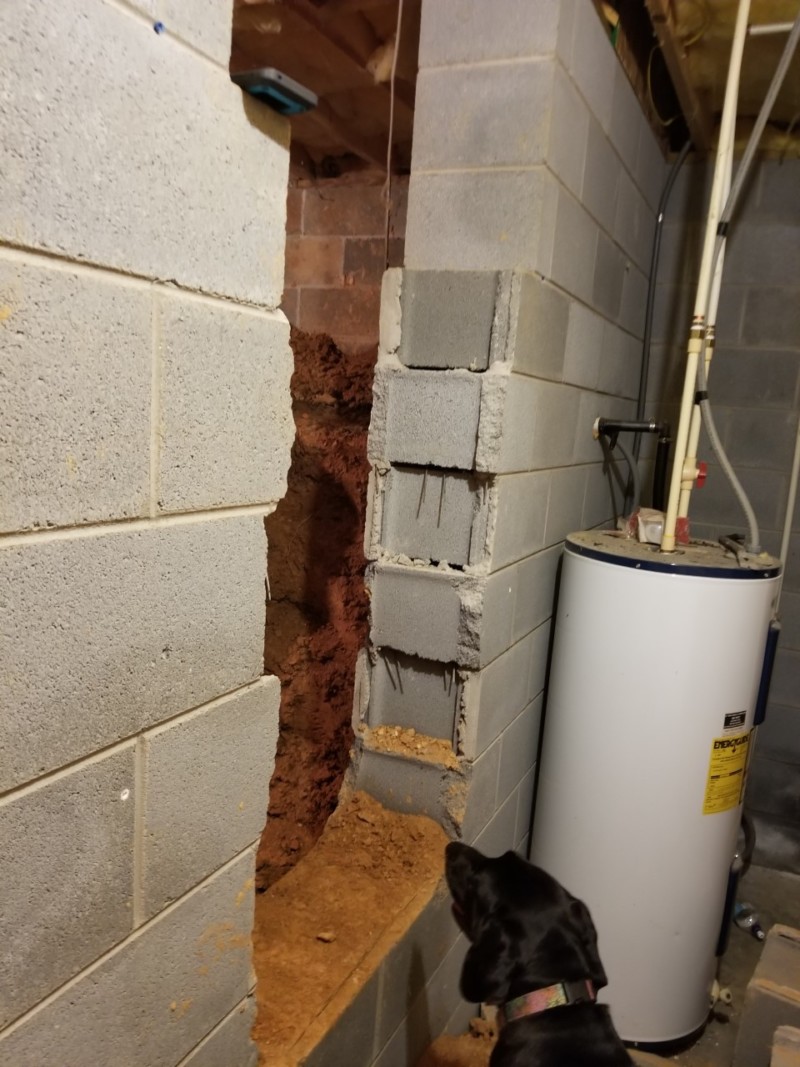
When the clinker blocks were removed to where we could go up inside the crawlspace , the fun took off . I should mark here that when grinding or knocking out cinder blocks , junk is going to fly .
Be indisputable to use a condom mask when doing this to keep from filling your lungs with junk .
2. Dig and Dig Some More
My husband recently bug out a new job . For those of you who have come this blog for any length of clock time , you fuck his onetime job allowed him to be home betimes in the daytime .
Well , his new job ( which has been a good thing ! ) takes him away from home more than his previous job did .
I say this to let you know ; this task engage us much longer because of how limited our time was to work on it .

All in all , our family of 5 spend 4 - 5 days jab for approximately 4 hours each day .
However , we only had free days on the weekends which meant this project equated to about a month worth of Saturdays .
We dig up the intact ascendant cellar out by bridge player . The crap was compact past a sure item which intend it was our only method .
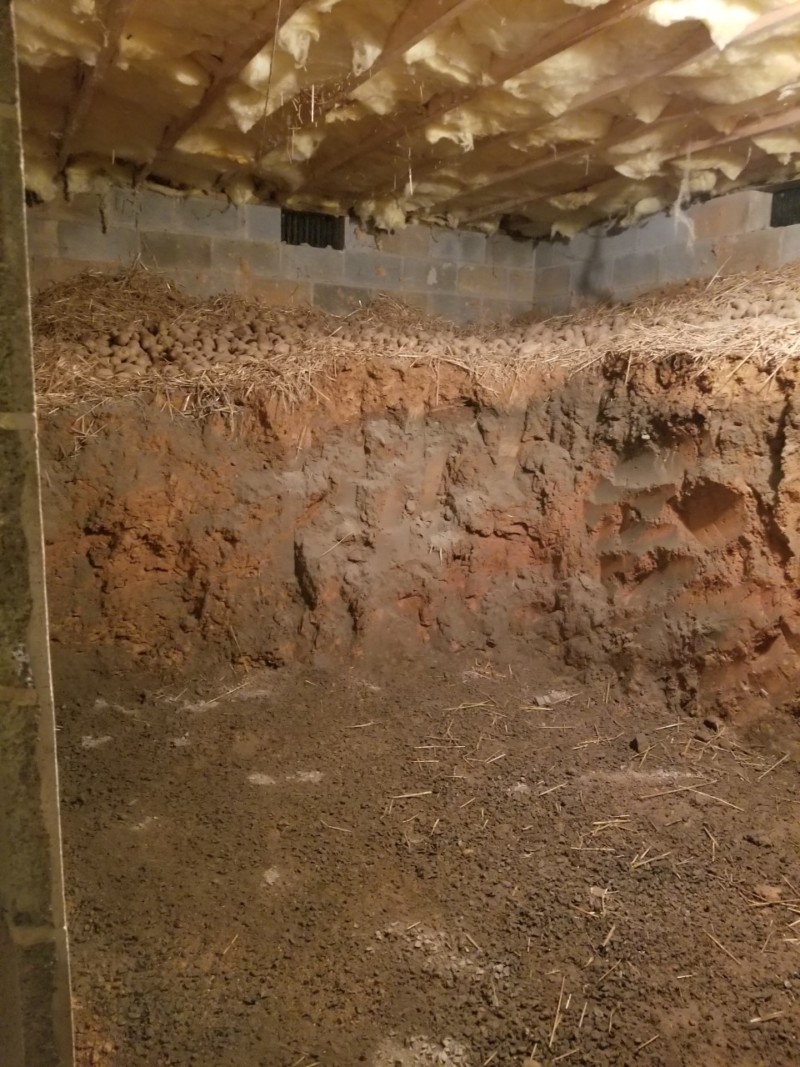
Therefore , my hubby would dig and satisfy a bucket , and we imprint an assembly line from the crawl space to the back door .
We ’d hold off until the dirt piled high up and utilize the tractor to move the dirt for landscape gardening purposes around the property .
Truthfully , there were daylight I regretted bulge this undertaking . The business was mussy , and I had grime around my home for a calendar month . Yes , it was hard work and tiring , but in the end solely worth the mess and aches we had .

If you have a crawlspace that is n’t filled with dirt , a great deal of the work was done for you by whoever built your home . Our pillowcase was an peculiar - glob ( go figure ! )
In the event you have to dig out your crawl space , be indisputable to leave dirt around the walls about 3 - feet deep to ensure the walls are strong and wo n’t collapse .
3. Level the Floors
When we finally take away all the dirt from the crawlspace , we had to rase out the story . This was a playfulness problem , for me at least .
Any bumpy parts in the level had a excavator pushed over them to take out the excess shit . Once the dirt was shaved off , we ’d go over the loose turd with a slant to ensure everything was even .
It may not be as important to you to have storey floors . In our case , I already had shelving I was using to hold my jar in the basement .
I needed those same shelves to be transferred to the root root cellar . Therefore , the floors had to be level enough for the shelf to have a unchanging billet to roost .
4. Apply Concrete
When the trading floor were leveled , it was meter to add the concrete . In the midst of us building our ascendant wine cellar , we had a hurricane come through our domain .
The vents in the root basement caught some rain because of how quickly and how hard the rain come down with the hurricane . The piddle from the hurricane flooded our cellar by ooze in through the foundation garment which had n’t hap in the 11 years since the house was built .
The long and little of it , we knew we wanted the walls reinforce even though we made them thicker because we did n’t want hurricane type rains ever to cause an issue in the beginning wine cellar .
We also chose to lick smarter alternatively of hard . We used the wet , which had made its way into the crawl space from the vent during the hurricane , to help oneself form concrete .
Be sure to use a masque during this part of the process because it will get dusty . We sprinkled the concrete on the bulwark and floor . It took about 10 bags of speedy setting concrete to get the job done .
Once the concrete was in home , we waited about 20 second and pulled the weewee hose into the crawlspace . We wet the concrete and let it sit for 24 hours .
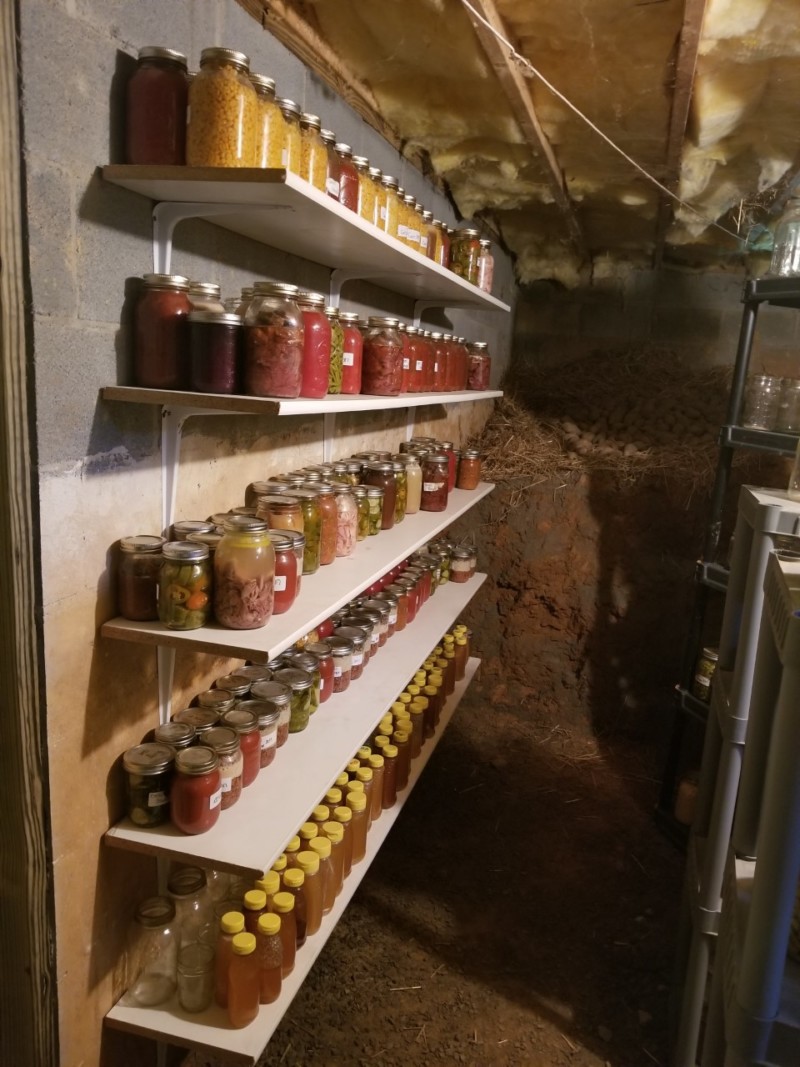
5. Add Straw and Shelving
I liked the duncish wall because at the top it left a natural ledge . I prefer not to put concrete on this shelf because it was a great place tostore potatoes .
Instead of take it concrete , we coated the dirt with a boneheaded level of straw and add together our potato .
Once the potatoes were in place , we added the shelving for ourcanned commodity . I used stocky credit card shelves to withstand some canned goods , but I also rise shelving to the clinker pulley-block wall in the root root cellar .
This gives me plenteous storehouse for many of our canned goods throughout the twelvemonth .
6. Hang a Door
The last step of the cognitive operation is to seal the beginning cellar . infinite where our root basement is now had blowhole in prior to us repurposing the blank space .
Be trusted to have proper ventilation in your root cellar . It ’s also a good idea if the vents can afford and closemouthed . During the wintertime months when the temperature get down to freeze , you may need to close off the airflow to keep your nutrient from freeze .
Because of our narrow-minded hallway berth , we chose to ramp up abarn doorto end the entrance to the root cellar . The barn doorway admit us to seal the root cellar but also not take up worthful space by opening and closing a door .
We also had to summate a step to get into the tooth root cellar because I was tired of dig out . I did n’t want to have to dig out the floor down two more layers of cinder city block .
You may not need steps depend upon the exercise set - up of your crawlspace . This tooth root root cellar required a great trade of manual labor , but little as far as out of pocket toll go .
We build our barn threshold for less than $ 100 , and we spend some $ 50 on concrete . I already had the shelving we included in the theme root cellar , and excavation was free too .
It was a Department of Labor - intensive caper , but one I ’m extremely grateful we took on . It helps our home and farm social occasion more adequately , and it ’s commodious to have a etymon cellar I do n’t even have to walk outdoors to get to .
If you do n’t employ your crawl space , this clause will give you a big approximation as to how you may go about using your crawl space in a hardheaded elbow room .
I also hope your root cellar transition will postulate less labor than ours did , but if it does n’t , it ’ll be worth it !
Was this article helpful?
What went wrong?
This article hold in incorrect info
This clause does not have the information I am see for
How can we improve it?
We appreciate your helpful feedback!
Your answer will be used to better our capacity . The more feedback you give us , the well our varlet can be .
