If you grease one’s palms an item via links on this Thomas Nelson Page , we may earn a commission . Our editorial content is not influenced by commissioning . take the full revealing .
reforge . It can be fun , but it can also be an wearing process that taps you of cash and saneness . Do n’t let the latter happen to you .
We ’re working on remodeling our second mansion . Our first was interesting because the entire thing had to be redo to become livable .
Our new home only requires a few update . Because of the lessons study when remodeling our first dwelling , when it come time torenovateour new kitchen , I roll in the hay exactly how I was depart to handle the countertop .
If you sleep together butcher block countertops , then you will love this DIY choice . Creating your own butcher block countertop is loose and cost - effectual .
Here ’s how we made and establish our own fumbler stoppage countertop :

You’ll Need:
1. Out with the Old
The first measure to couch in new countertop is to hit the old ones . Remove any old trim , backsplashes , the cesspit , and onetime countertops .
However , leave the wood underlay beneath the countertops . It will serve as the documentation for the newfangled countertops and make them thicker as well .
You ’ll probably have to use your pounding to work over the trimming loose . Be certain to watch out for your fingers to quash a sore ovolo .
When everything has been move out , be certain to discard each item using the appropriate method acting . If you ’re going to reuse your cesspit , be sure to keep it in a safe location , and do n’t be afraid to upcycle any token .
2. Measure and Mark
Once the sometime has been slay , it ’s metre to focus on the new . deplume out your trustworthy tape measure and see how long your countertops are .
Be sure to measure accurately because if you ’re off a short , it could cause you to either cut too much or to have to make multiple cuts to make the wood tally right .
When you know what measurements the plywood should be cut down , use your acquisition catch and cut the plywood to match .
After the plywood has been cut , bring the wood back to the comeback and , using a pencil , differentiate the edge of the counters . Be sure to mark on the undersurface of the plyboard .
Be sure to mark where the cesspit go in the parry as well . When everything is mark , take the plywood from the counter .
3. Time to Cut
We have a largefront porchwhere we did most of our thinning because it was convenient . When the plywood had been marked , the woodwind was accept to the front porch to make out everything to shape .
The science saw traced the pencil mark . You ’ll probably need a few people to avail hold the wood still while you disregard .
Be thrifty because a skill sawing machine will alternate around on occasion . verify you stomach far enough back to head off pay back smart if the saw jumps from the forest unexpectedly .
When you ’ve traced the edges where the counters stop and also describe around where the sink go , you should be pass on with wood resembling a countertop and a hole in the middle for the swallow hole .
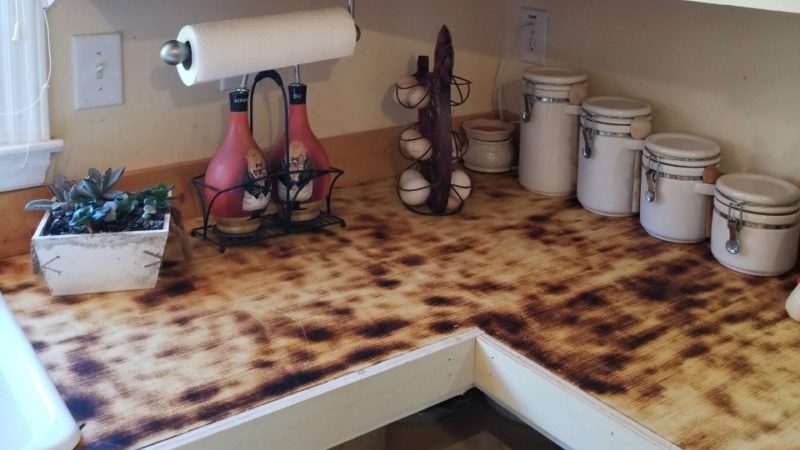
4. Burn Baby Burn
I ’ll admit , this part of the physical process made me a small nervous . It can be skip , but we pick out to go with it .
When we produce wooden countertop in our previous kitchen remodel , we did n’t burn the Grant Wood . I favour the benighted color , and I also want to check that our wood was thoroughly seal .
Last time , our counters turned out fine , but I want to give this extra step a attempt this time around . It ’s a personal decisiveness and up to you .
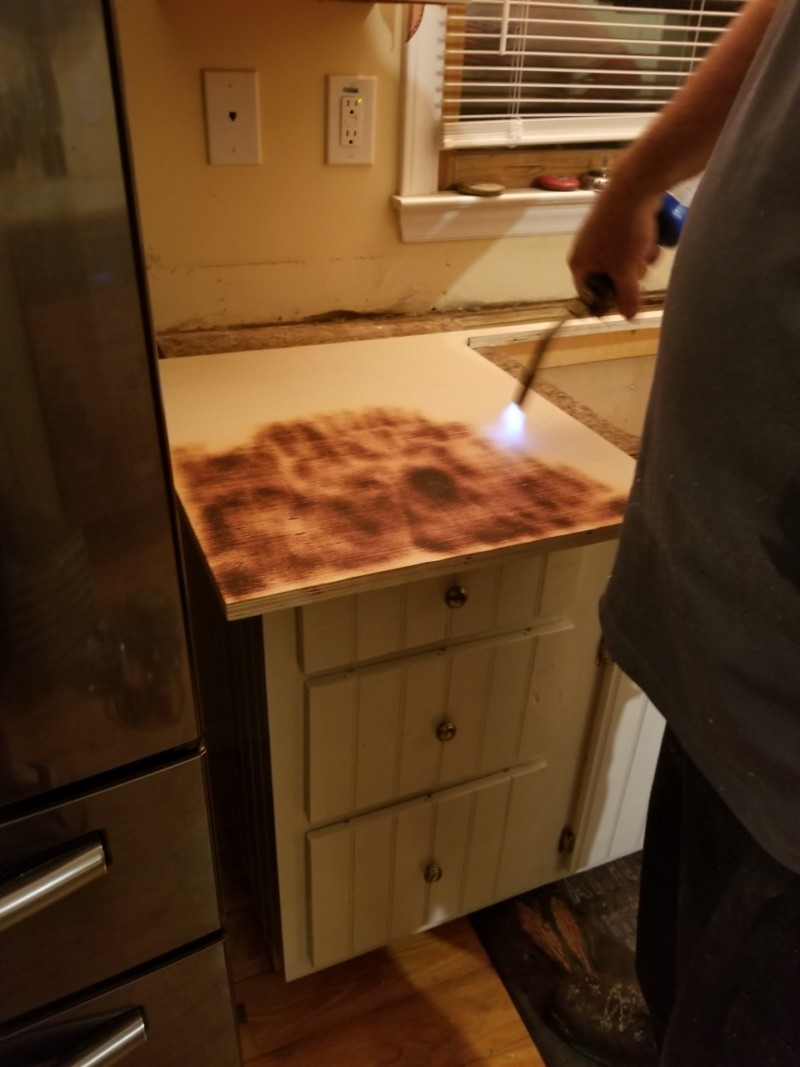
If you ’d like to bite your countertops , pull the plywood away from the walls and away from anything which could catch fire .
light braze the wood with your Verbascum thapsus . Do n’t leave it on any one area for too long because you do n’t need the wood to enamour fire .
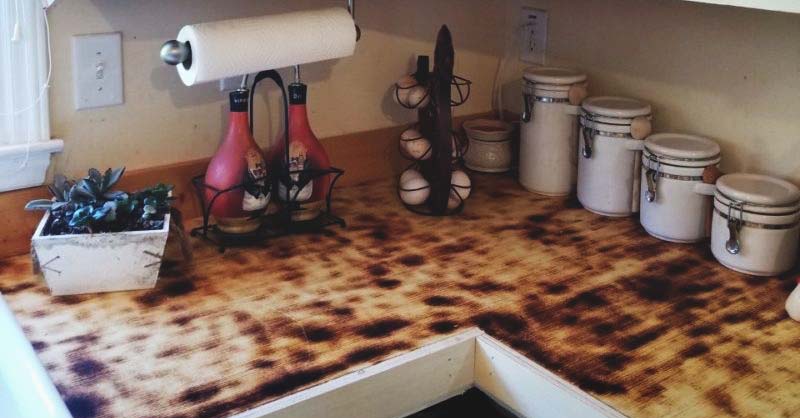
The torching will make the wood darker , bring out the purpose in the forest , and it also helps to seal the wood .
Sealing the wood is crucial because you do n’t want intellectual nourishment to get into your countertops when preparing food . We ’ll utilise another footstep to stay to seal and sustain the wood later on .
However , because this can avail seal it , it was worth the extra meter .
5. Apply What You Know
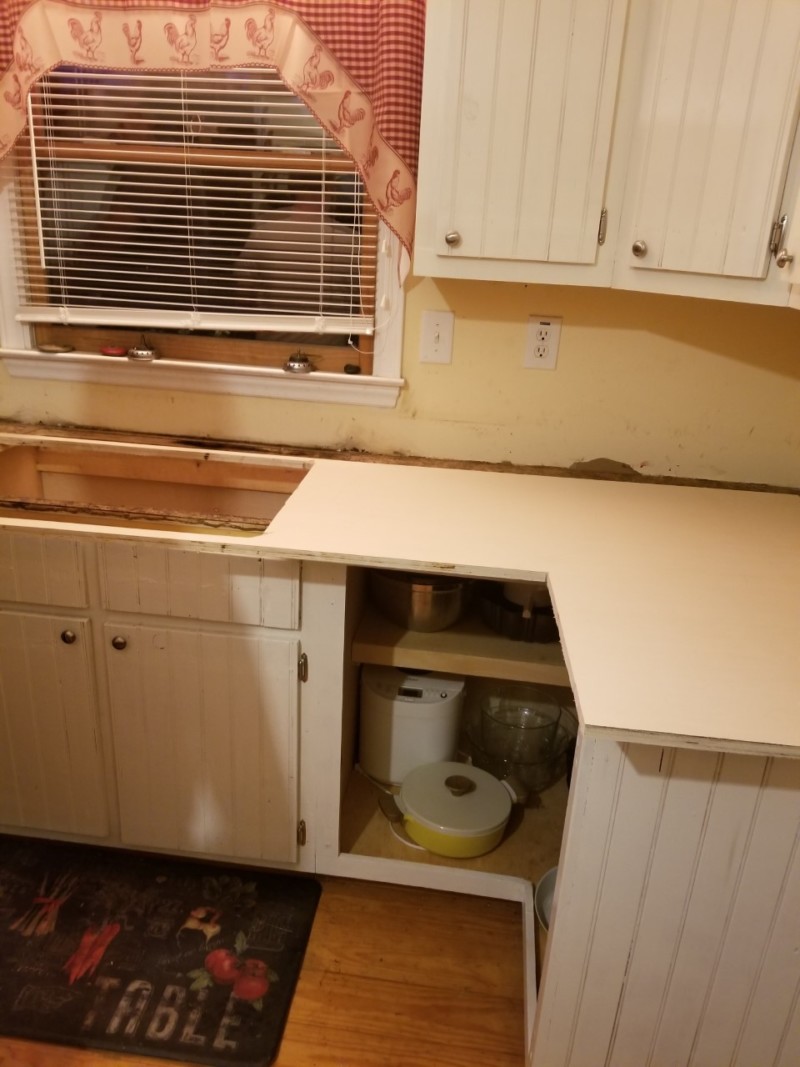
After the wood has been cut to equal your measure and has also been scorched , you ’re ready to apply it . You ’ll probably need a friend to serve carry and suit the plywood where it should go .
When the plyboard is in place , apply your nail grease-gun and nails to insure the woods to the original rejoinder . Place multiple nails at the edges because you do n’t need the countertop to give in up .
It ’s important to nail along the back and front side edges as well to batten the countertop as well . The idea is to grade where the trim will go to cover any nail from view .
6. Rub It Down
With the countertops in place , it ’s time to varnish and nourish the Ellen Price Wood . Use a dry rag and mineral crude to carry out this .
I poured a decent amount on the riposte and used the rag to evenly hold the mineral oil color to all parts of the countertops .
When the woodwind has douse up the first coat , I apply a s . Until the Grant Wood felt to the full covered with oil , I kept applying .
The approximation is to leave the countertops find moist with oil and glistening . When this happens , you ’ve applied an appropriate amount of mineral petroleum to your wood countertop .
you could go forwards and put your sink in at this point as well . It should n’t hurt your counters , and you do n’t want to be without having use of your sink for a few day while they dry .
7. Put Everything Back
Leave the countertop overnight to dry out . It ’s unwashed for them to even feel sticky for a day or two after the applications programme of mineral oil .
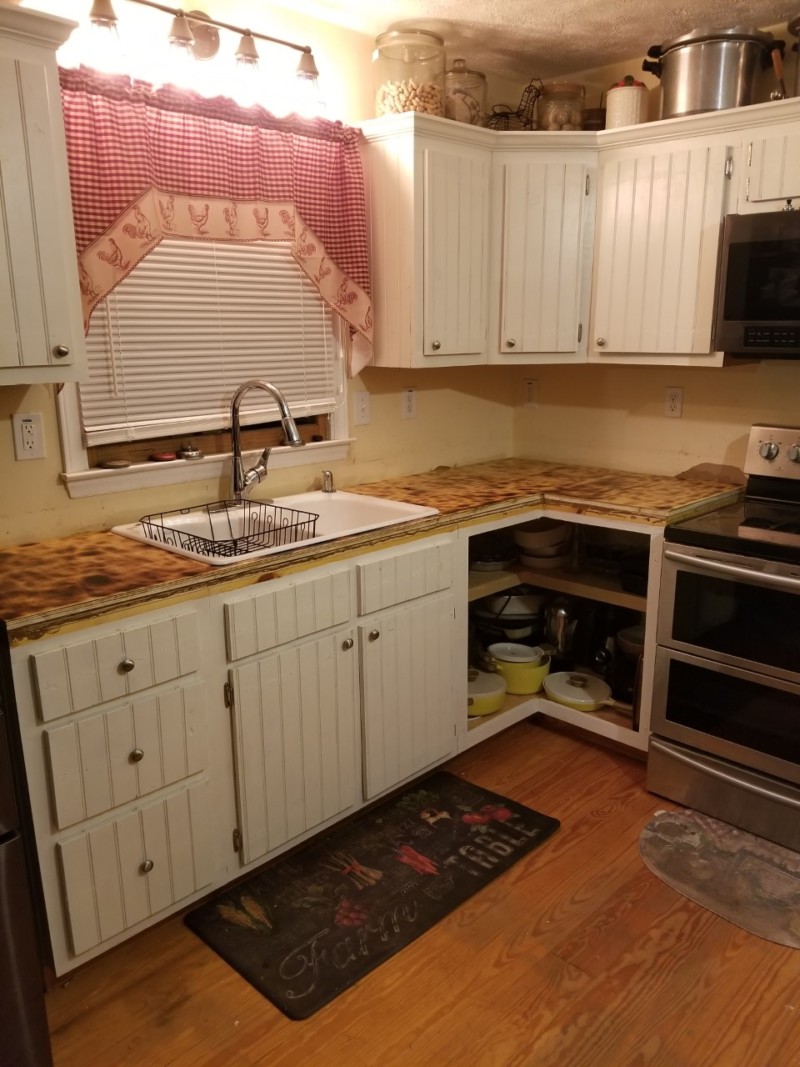
When the counters are dry , you could reattach the passementerie and backsplash to the outskirts of the retort and walls .
Also , when the counter are ironic , you could begin using them again . Put any case shot you may have removed or any appliances back on them as well .
Your kitchen can now be used ordinarily as it would ’ve been before the remodel .
8. Maintenance Is Important
Though the kitchen remodel is done , the upkeep is not . Butcher block countertop are toll - effective and a gorgeous choice for counters .
However , they need to be well cared for . If you do n’t , the Mrs. Henry Wood becomes porous and will crack . Which is n’t safe for the appearance of your kitchen nor for intellectual nourishment safety .
Therefore , you must apply mineral oil to your counters in a sound amount once every 2 week for the first 6 months . This care task is n’t an expensive thing to do , nor is it a vast chore , and will make your countertops healthy .
After 6 months , you should embrocate them once a month or once every other calendar month . The idea is to keep the woodwind looking and palpate levelheaded .
If at any clock time your countertop begin to count or find unannealed and dry , do n’t be afraid to add more mineral oil to them .
So this is how you make and install your own DIY blunderer block countertops . Hopefully , this will convey raw life to your kitchen without breaking the bank .
Butcher block countertop are functional and easy to care for . I hope you ’ll relish your countertops as much as I ’ve enjoyed mine over the year .
Was this article helpful?
What went wrong?
This article contain wrong information
This article does not have the information I am attend for
How can we improve it?
We appreciate your helpful feedback!
Your reply will be used to improve our contentedness . The more feedback you give us , the comfortably our pages can be .
