If you grease one’s palms an point via links on this Thomas Nelson Page , we may realize a commission . Our editorial content is not influenced by commissions . Read the full disclosure .
Have you ever considered making your own sausage balloon orbacon ?
What about bring around and smoking yourown Ham ?
Well , if any of these estimation have ever fascinated you , then you might want to regard build your own meat house .
But what if you are on a budget ? And I mean a nasty one !
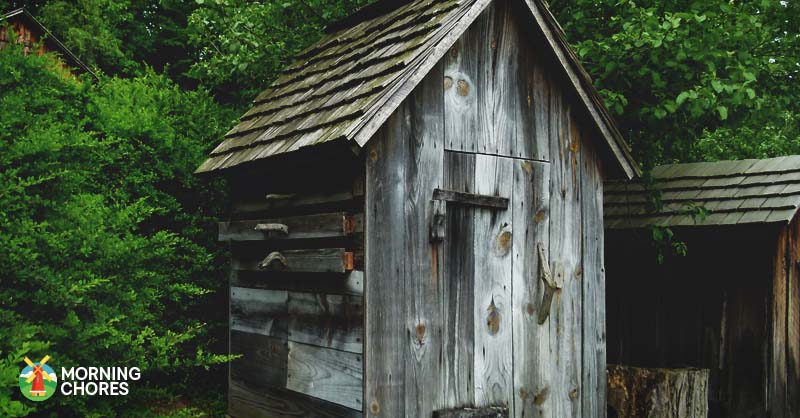
Then you may do what we did . We built a stag party this week , and by utilizing the materials we had lie around , we were able to build up this meat house for about $ 20 .

Now , I realize you may not have all of the same textile , but you may be able to use this as a spring off point to utilize materials you have just hanging around .
But even if you bought all of the materials brand fresh , you would n’t have a Brobdingnagian expense on your hands .
How to Build a Smokehouse Inexpensively
1. Location, Location, Location
The liberal part of build a meat house is deciding on where you are going to locate it . After lots of enquiry , we learned that come out it somewhere in the nicety is the near option .
fundamentally , the reason is that when you have meat hung in a meat house you do n’t desire to worry about the sun making the temperature fluctuate too much . This can actually make your heart to ruin .
So when select a localisation , you ’ll need to make trusted that you pick out a bit where there will be some aegis from the sun .

For us , we chose to place our smokehouse near the tree line of business so it would still get some protection during the winter , but that it would unquestionably be shaded during the ardent calendar month too .
2. Lay the Cinderblocks
This whole process begin by laying out our cinderblocks . We had these on manus from our late homestead . We had ordered a huge shipment of cinderblocks to cease out a foundation task on our old home .
So when we incite we brought all of the leftover materials we had . We put some of them to good use on this labor .
Now , we terminate up making a 4 ft by 2 ft meat house . The smaller the smokehouse , the more effective it is .

grant , it wo n’t hold as much heart , but I ’m looking to feed a family of 5 so I do n’t plan on smoking a short ton of meat at one time .
However , back in the old twenty-four hour period , people had much larger family that all live very active lifestyle on the farm .
So obviously , they required a lot more food and smoke and curing marrow was a great path to provide for their nutritional needs . Just keep all of this in judgment as you are deciding on how large a meat house you really need .

3. Frame the Base
The next step is to draw up the base . We began by framing the bottom of the base with pressure treated 2×4 ’s .
Then we made a pack over the top of that with non - atmospheric pressure treated 2x3s . It is recommend that smokehouses are made with non - pressure treated wood . The reason is when they fire up up , you do n’t need any chemical being released from the wood and into your food .
However , we knew that the bottom would have wet drain down on it , so it need to be protect . But since the pressure treated Mrs. Henry Wood was at the very bottom of the meat house and cover , it releasing chemical into the solid food should not be an publication .

4. Frame the Building
Next , you ’ll use the 2×3 ’s to ramp up up the human body of the building . You ’ll need to have a upright piece at one front corner , a vertical piece at the other front corner , and then a horizontal piece connecting the two .
Then you ’ll do this on the backside of the building as well . You ’ll end this footmark by cutting 2 more horizontal pieces of wood to duration out of the 2×3 ’s to connect the front and back subdivision of the building .
5. Create the Roof
Now that you have your construction digest upright , it is clock time to create the ceiling . You ’ll cut your 2×6 ’s to make the type of summit that you ’d like for your roof . You ’ll need to produce identical flower for both the front and backside of the smokehouse .
Then you ’ll practice the scraps go away over of the 2×3 ’s to make bracing for your roof . You ’ll place them evenly across the roof with screws to support the metal .
Once your brace is done , you’re able to use the sheets of 8 - foot metal . You will have to cut them to size and stop up them with screws .

Now , you may be wondering about add up a blowhole to the roof . We added a piece of flashing across the top of the cap . This will provide the roof to vent the smoke .
So we did n’t have to add an literal pipe vent out of the top of the meat house . It made this projection so much easier .
6. Brace the Structure
Now that your roof is in place , it is sentence to brace the social organisation . You may observe at this point that the construction can still move around on the cinderblocks , and it feels a little flimsy .
Well , you ’ll desire to expend some 2x6s . You will snub them to size and place 2 braces on each side of the meat house and the back of it . you’re able to see from the moving-picture show how we spaced ours for optimal support .
Again , you ’ll have to secure these with screws . Once they are in place your building should feel less wobbly . We will take care of the base moving on the cinderblocks in a later step .

7. Apply the Metal
This was the interesting part . We actually found these old sheets of metal in the wooded part of our domain . The old owner had purchase them for a project and just forget the remains .
However , when you go to cover your smokehouse , it can get costly . I would like to finally go over our smokehouse with cedarwood , but for now , this is belong to ferment just ok .
So you ’ll need to cut your alloy for the back first . You ’ll have to do some fine tuning on your trimmings , no doubt , because of the flower of the roof . It took us a few tries but eventually , we set out everything to match together .
Then you screw the metallic element in place . We used 3 dissimilar stinger pieces of metal across the back to get it fully covered .
Next , we handle the side of the meat house with 2 dissimilar cut of the metal . Then we had some excess metallic element hang over the side from the back of the smokehouse .
So we decided to splice it in sure sections so it would be easy to bend . We fold it over so it would breed the exposed wood on the side and give the corners a more ruined look . We secured the flapping of alloy with piece of ass to the side of the meat house .
Once this is done , you are ready to move on to the finishing touches .
8. Build the Door
We really built our smokehouse door . We had an honest-to-god crybaby hencoop on our prop that had n’t been used in years . We have been tardily take on it apart and make unexampled things with it .
So it was created out of rough trimmed wood , which is where our rough cut baseball bat came from . We then measured the doorway and cut the wood to size .
Then the piece of Mrs. Henry Wood were screwed together to make an actual door .
Next , we put winkle in the door to protect it from any water . Then hung the door on hinges using the logic gate set .
From here , we had a meat house that was quick to serve .
9. Paint and Shelving
Now , there are a few finishing touches that will need to be made to your smokehouse . The first of these touches is paint . Where we used onetime rusted metal , if I do n’t want it to keep wear down , I ’ve get to use a wire brush and knock all of the rust off of it .
Then I ’ve incur to prime the construction and rouge . This will help protect the alloy from being destroy . I have n’t quite gotten there yet because in the middle of our building project what was supposed to be a ‘ light dusting ’ turn into a few square inches of snow .
So once the weather condition clears , I ’ll finish the painting .
Also , you are snuff it to want to tally some shelves orhooksto make hanging nub in your meat house a little easygoing as well .
10. Concrete Floor
This is the part that is sluttish and lots of fun , in my opinion . You habituate a few bags of quick - drying concrete and dump them in awheelbarrow .
Then you ’ll mix them with body of water and ahoeuntil it is the trust consistence . From there you ’ll pour the concrete into the smokehouse . Your goal is to fill up the cinderblocks and go around the edge between the cinderblocks and the wooden base of the smokehouse so that the smokehouse will have a secure foundation .
11. Apply Your Heat
Finally , you ca n’t have a meat house without pot . you’re able to do this multiple ways . you could expend a wood stove that is attached to the smokehouse through a vent .
Or you’re able to apply propane . To get down , because we need to be able-bodied to bring around and fume gammon in a hurry , we are going to use propane .
But I ’m planning on save a keep up - up clause on this about how we are make our own out-of-door woodstove from a cask to work for our meat house . As long as you may get the smoke to your smokehouse , you ’ll be in occupation .
So you now have statement on how you’re able to build up an inexpensive meat house with cheap material or even material you may already have hanging around your property .
But now I desire to hear from you . Do you have a meat house on your attribute ? Do you have any pointers for someone wanting to build one from upcycled materials ?
Was this article helpful?
What went wrong?
This article contains incorrect information
This clause does not have the information I am looking for
How can we improve it?
We appreciate your helpful feedback!
Your response will be used to improve our content . The more feedback you give us , the better our page can be .
